How to Integrate Amazon Pay

Andy
Last Update 4 years ago
Amazon Pay can help you increase conversions and boost customer loyalty by offering a seamless, secure payment option during checkout. There are two parts to configuring Amazon Pay:
- Take certain actions within your Amazon Pay account.
- Configure Amazon Pay within the ecomnation Admin panel.
Configure Your Amazon Pay Account
- Visit Amazon's Developer services and click on the Sign up for MWS button. If you are prompted to log in, please use your Amazon Seller Central account credentials.
- On the Amazon Marketplace Web Service page, choose "I want to access my Amazon seller account with MWS," then click Next.
- Accept the Terms and Condition, and click Next.
- Take note of your Seller ID, Marketplace ID, AWS Access Key ID, and Secret Key. You'll need those later.
- Go to Amazon Seller Central and log in with your Amazon merchant account credentials.
- Select Pay With Amazon - IN (Production view) from the drop-down near the search bar on the top right of the screen.
- Go to Settings and click on Integration Settings, then click on Edit under Instant Order Processing Notification Settings.
- Configure your URLs: Successful Payment Return URL: https://yourdomain.my39shop.com/payment_gateway/amazon/finish
Merchant URL: https://yourdomain.my39shop.com/payment_gateway/amazon/notification
Activate Amazon Payment Gateway Inside ecomnation
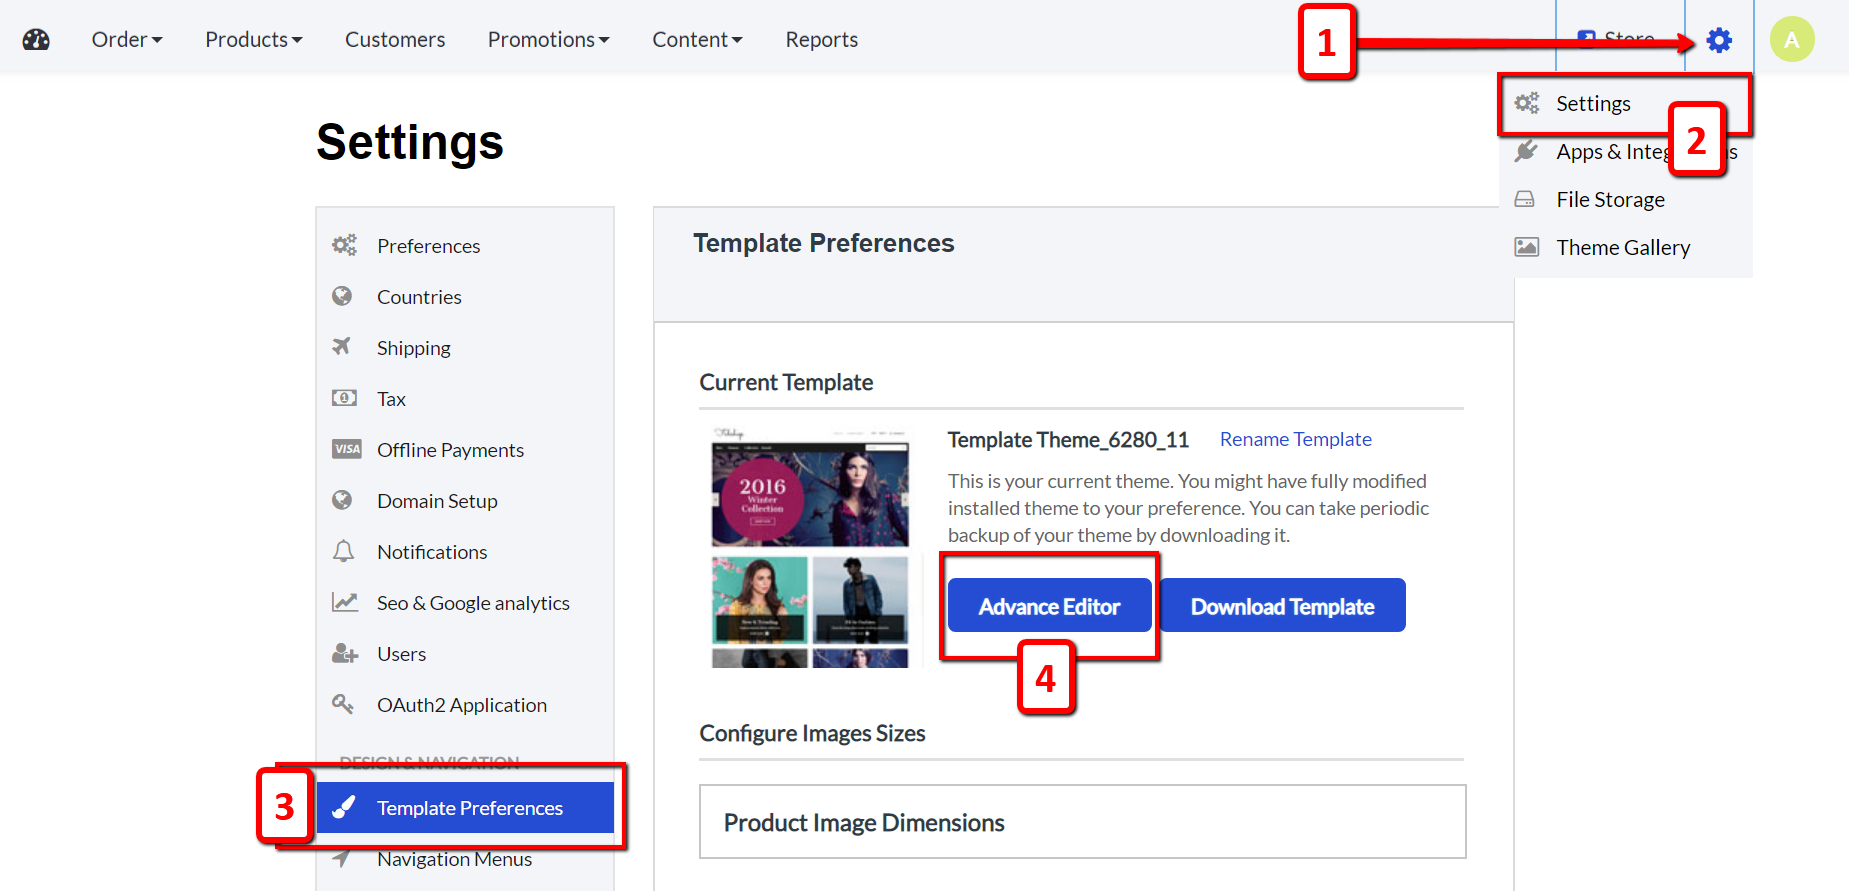
- Hover over the gear icon [1].
- Choose Settings [2] on the drop-down toggle.
- Click Template Preferences [3] on the left sidebar of the page.
- Click the blue Advance Editor button [4]. It will open a new tab for the codes you need to edit to continue:
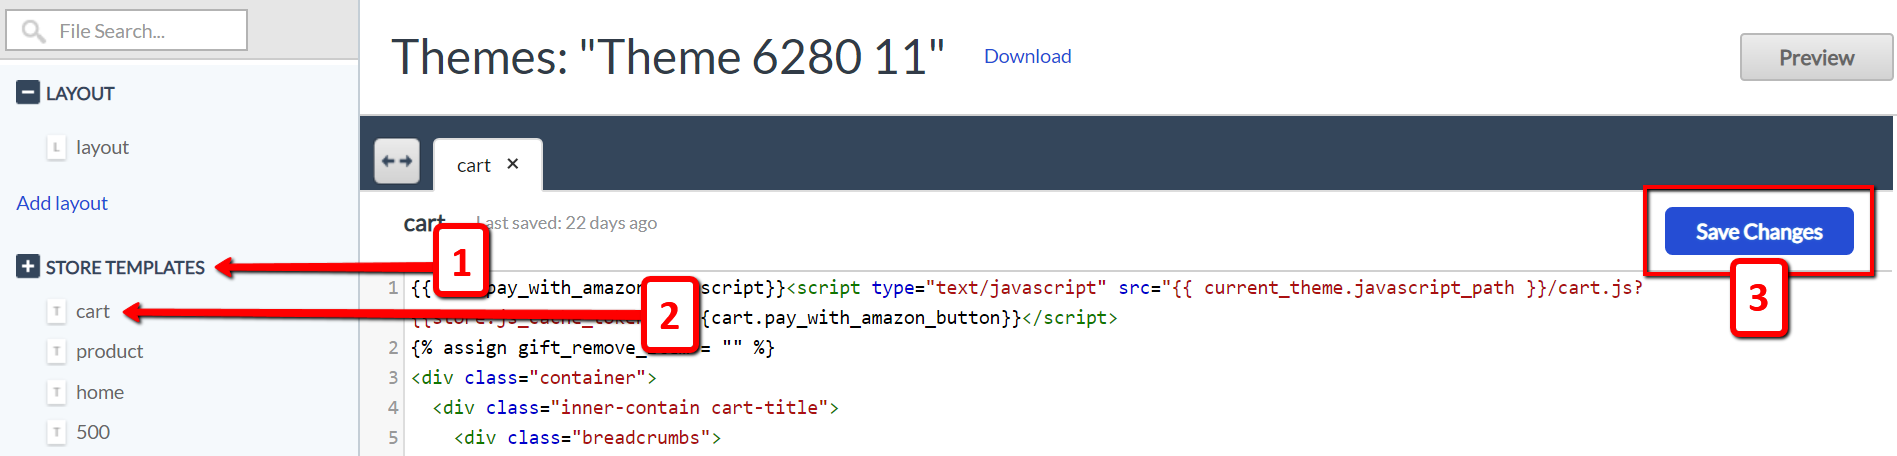
In the new browser tab that opens, you will see several tabs on the left that can be expanded to see the files that can be edited:
- Click on the Store Templates [1] tab and it will expand.
- Click the Cart [2] tab to put the customized codes you want:Copy and Paste {{cart.pay_with_amazon_javascript}} at the beginning of the page.Copy and Paste {{cart.pay_with_amazon_button}} just before <script> at the bottom of the page.
- After you’re done making modifications, click the blue Save Changes button [3]:
After you're all done with the required changes, the switch of Amazon Pay would appear on the ecomnation admin panel settings.
All ecomnation templates comes with Amazon Pay app by default. Upon completing the steps above, Amazon Pay Payment Gateway should be working. Please test your new payment method by making a small purchase.
If your template doesn't support the chosen Payment Gateway, you will need to follow additional steps to integrate the options to your online store.
Drop us a support request and we will be happy to help you out. Feel free to reach us out at [email protected]