How to Integrate Shipyaari

Andy
Last Update 4 jaar geleden
Shipyaari is a logistics aggregator and a product of AVN Business Solutions. It is a logistics service provider.
After performing this integration, you can schedule a pickup directly from the ecomnation backend. Shipping, scheduling and tracking will all be available at from within the ecomnation dashboard. This guide will help you integrate Shipyaari on your online store.
In this article, you'll learn how to set up Integrate Shipyaari to your store. There are a few things to know:
- You will need to take certain actions within your Shipyaari account.
- Configure App within ecomnation Admin panel.
To take certain actions, log in to your Shipyaari merchant account:
- Click the Account tab and,
- Choose My Profile.
- Copy the Client ID to your clipboard then paste it in a safe place as you will need it in the next steps.
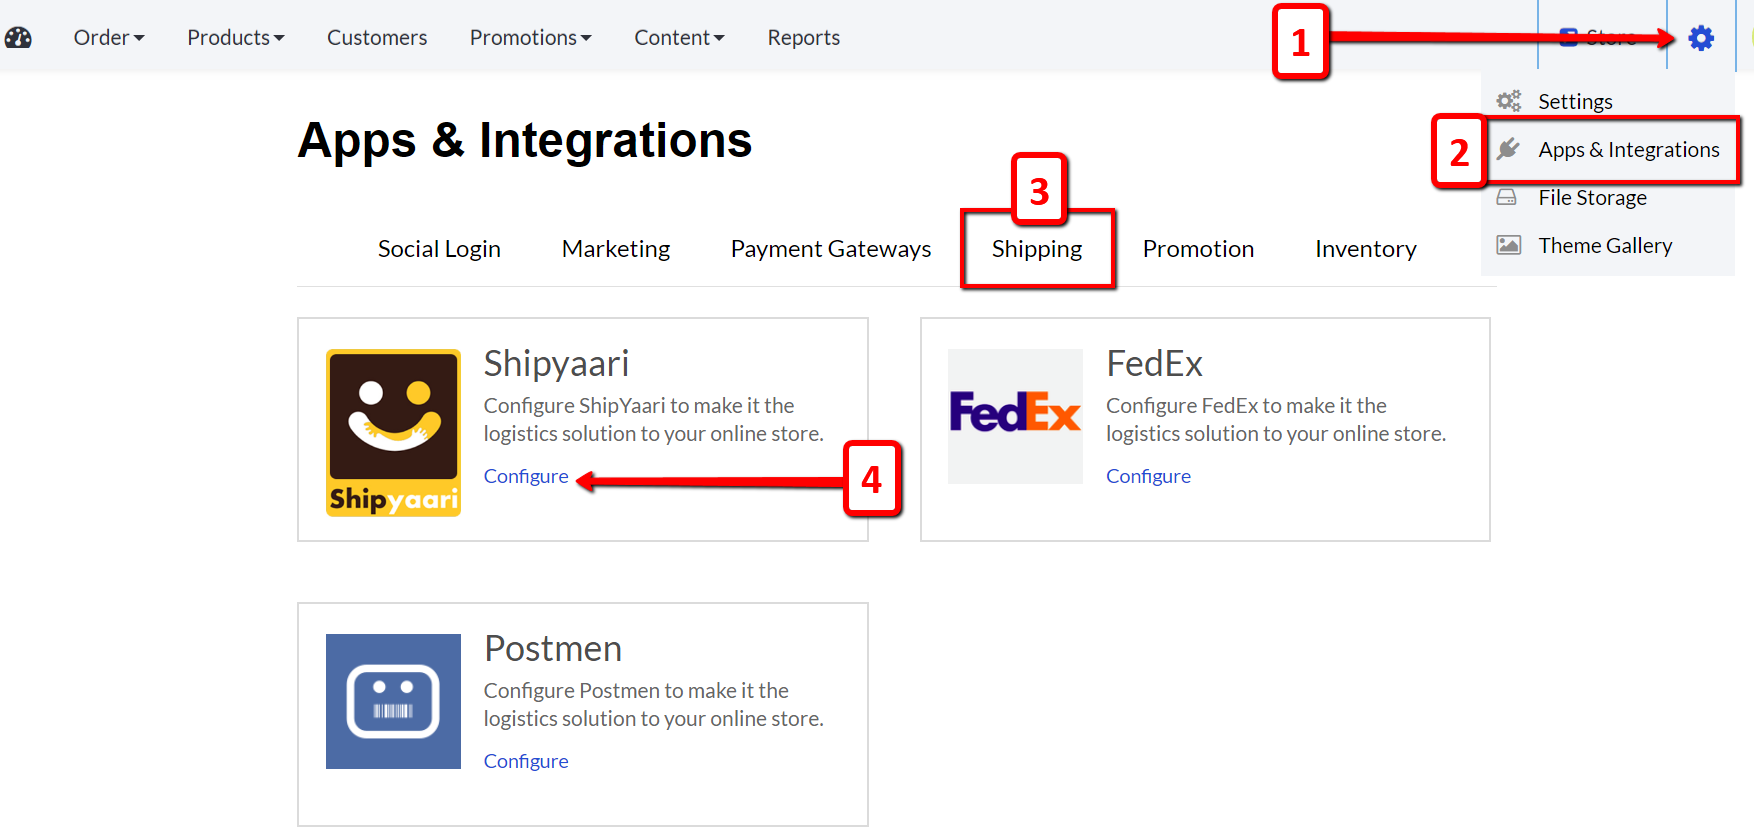
To configure the app in your admin panel, login to your shop’s admin panel dashboard:
- Hover over the gear icon [1].
- Click Apps & Integrations on the drop-down list [2].
- Click the Shipping label [3] and,
- Navigate to the Shipyaari box and click the blue Configure link [4]:
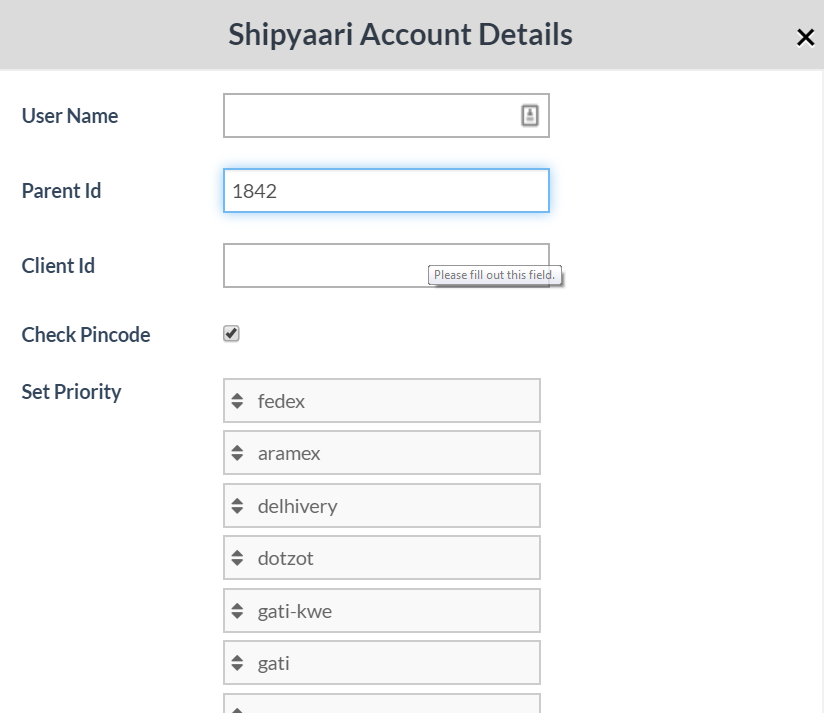
Clicking the blue Configure link will open a sub-menu:
- Fill in the empty fields with the required texts and,
- Paste the Client ID into the corresponding text box:
Make sure to hit the blue Save Changes button at the bottom after you're all done making modifications.
The Shipyaari app will automatically be turned ON after saving all of the changes described above.
All ecomnation templates come with the Shipyaari integration feature. Upon completing the steps above, Shipyaari integration app should be working. It's always a good idea to double check the integration by simulating a customer order.
Drop us a support request and we will be happy to help you out. Feel free to reach us out at [email protected]