How to Integrate Mailchimp

Andy
Last Update 4 tahun yang lalu
Mailchimp gives you the ability to create and manage mailing lists, newsletters, automated campaigns and more. It is a marketing platform that helps you manage and talk to your clients and customers.
We at ecomnation are happy to support the popular Mailchimp platform with an integration that enables the synchronization of registered customers’ data in your store to the Mailchimp portal. This integration will open a door for effective E-mail marketing.
In this article, you'll learn how to use Mailchimp to create campaigns. You will need to take certain actions within your Mailchimp account to properly integrate.
Mailchimp API Key
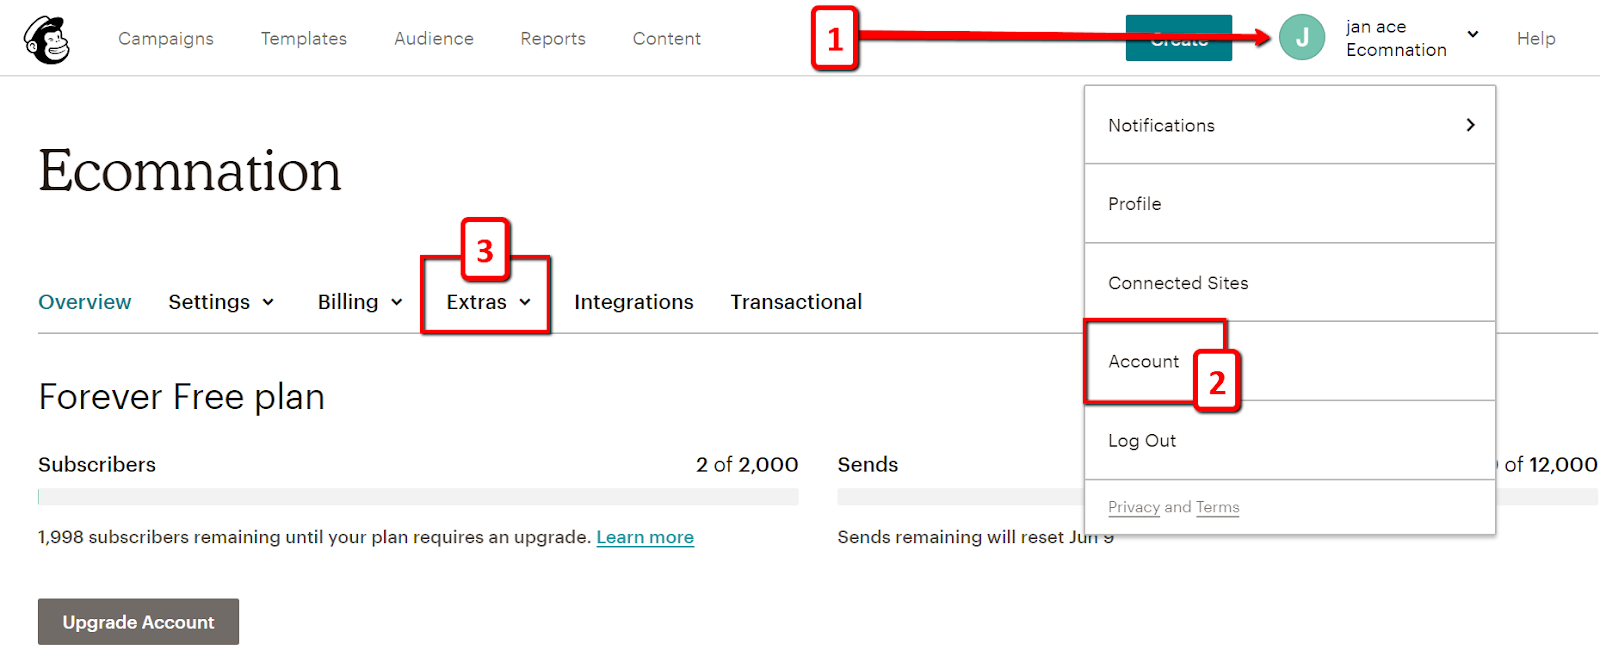
- First log in to your Mailchimp account. Click the Profile drop-down toggle on the top right corner of the page [1].
- Click the Account [2] button and,
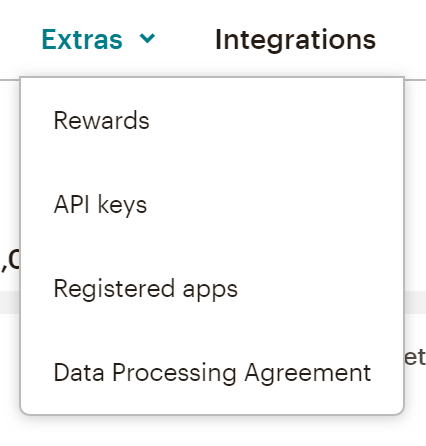
- Click the Extras [3] tab and a drop-down list would appear:
Choose API keys on the drop-down list:
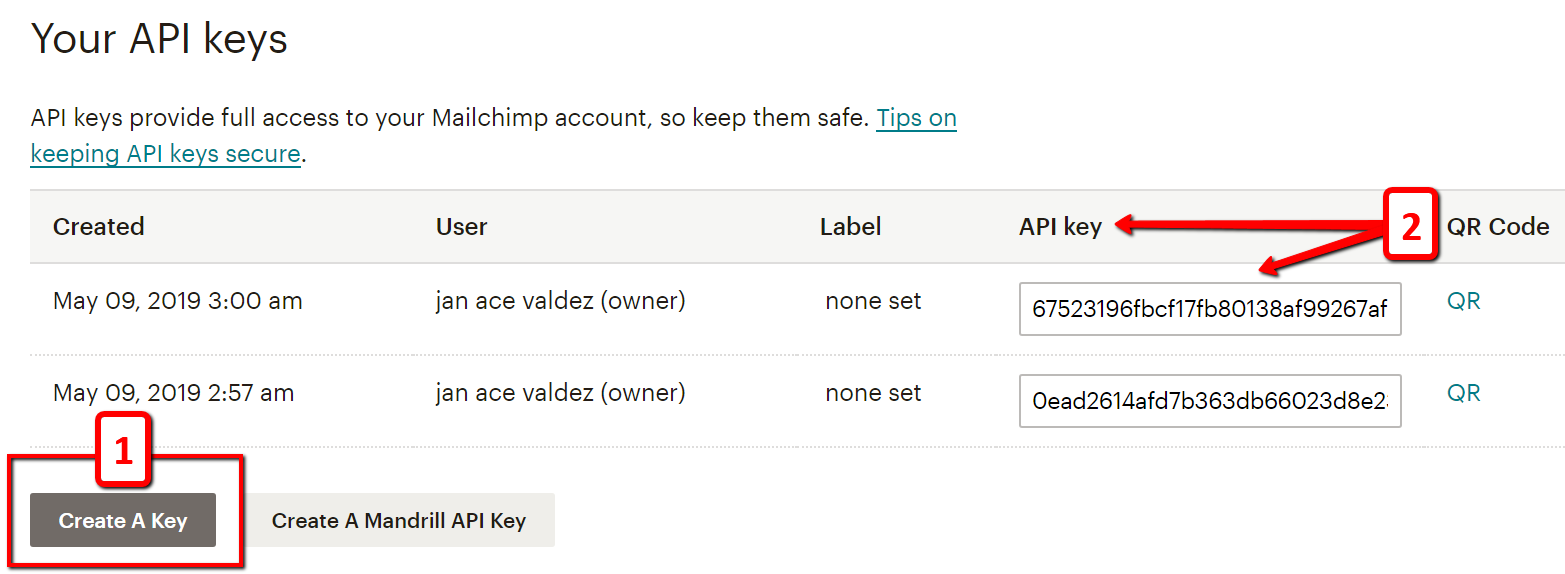
- On the API’s page, there should be a tab called Create A Key [1].
- After clicking it, the API Key will appear under the API Key column. Copy it to your clipboard [2]:
Mailchimp Audience ID/List ID
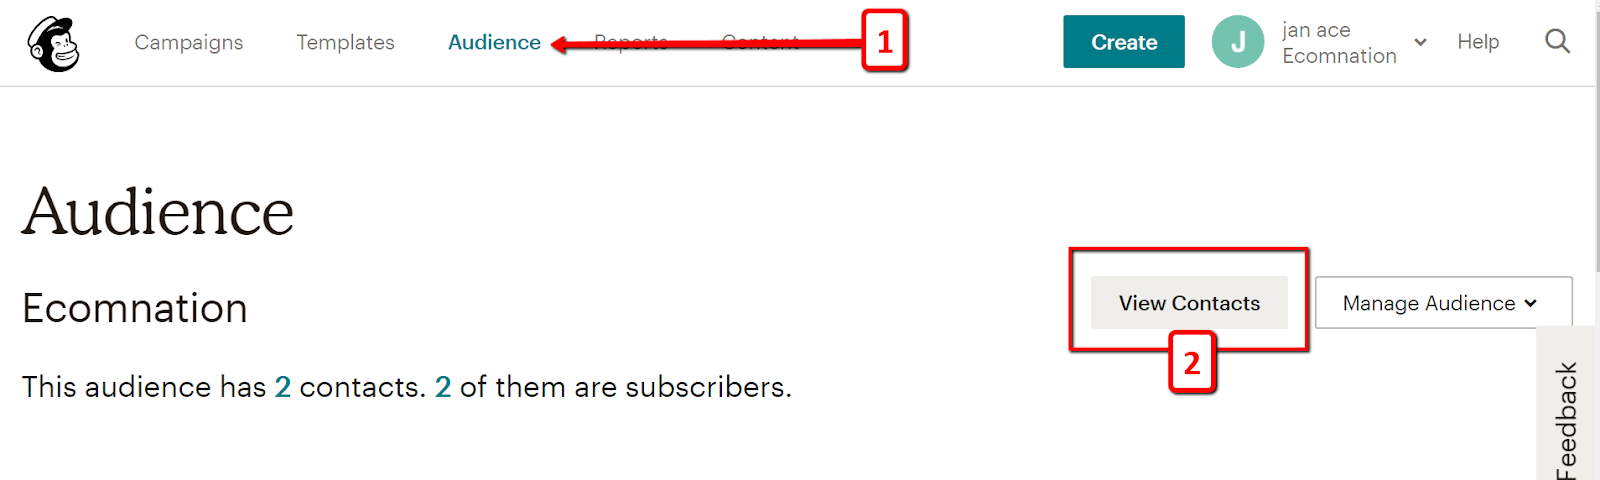
- The next step is to look for the Audience ID/List ID, from within your mailchimp account. Click the Audience [1] tab on the top left corner of the page.
- Click the View Contacts [2] button:
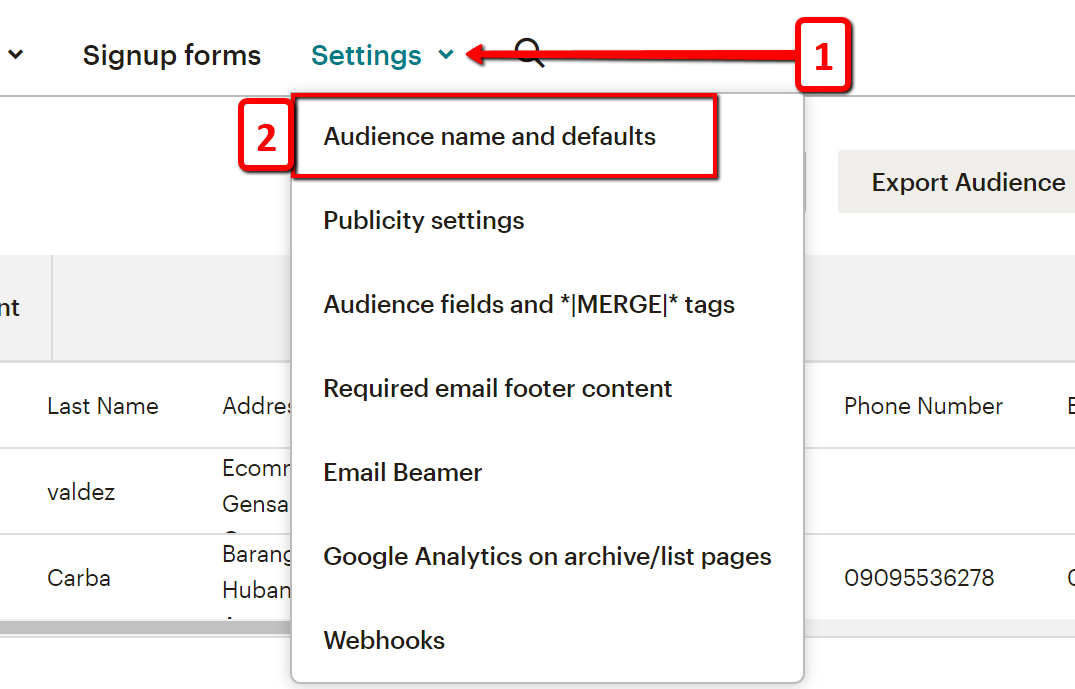
- Click the Settings’ [1] drop-down and,
- Choose Audience name and defaults [2]:
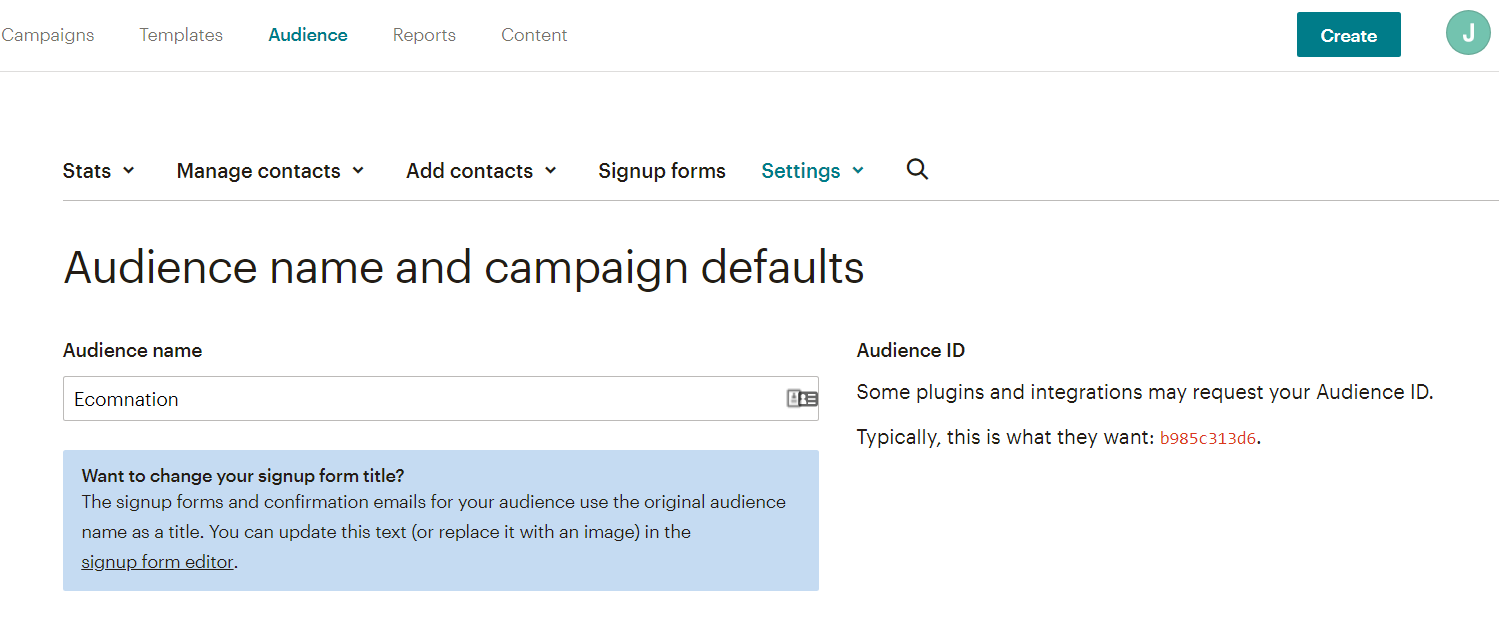
In the Audience ID section, you’ll see a string of letters and numbers. That would be your Audience ID/List ID. Copy it on your clipboard:
Activate Mailchimp app on your ecomnation store:
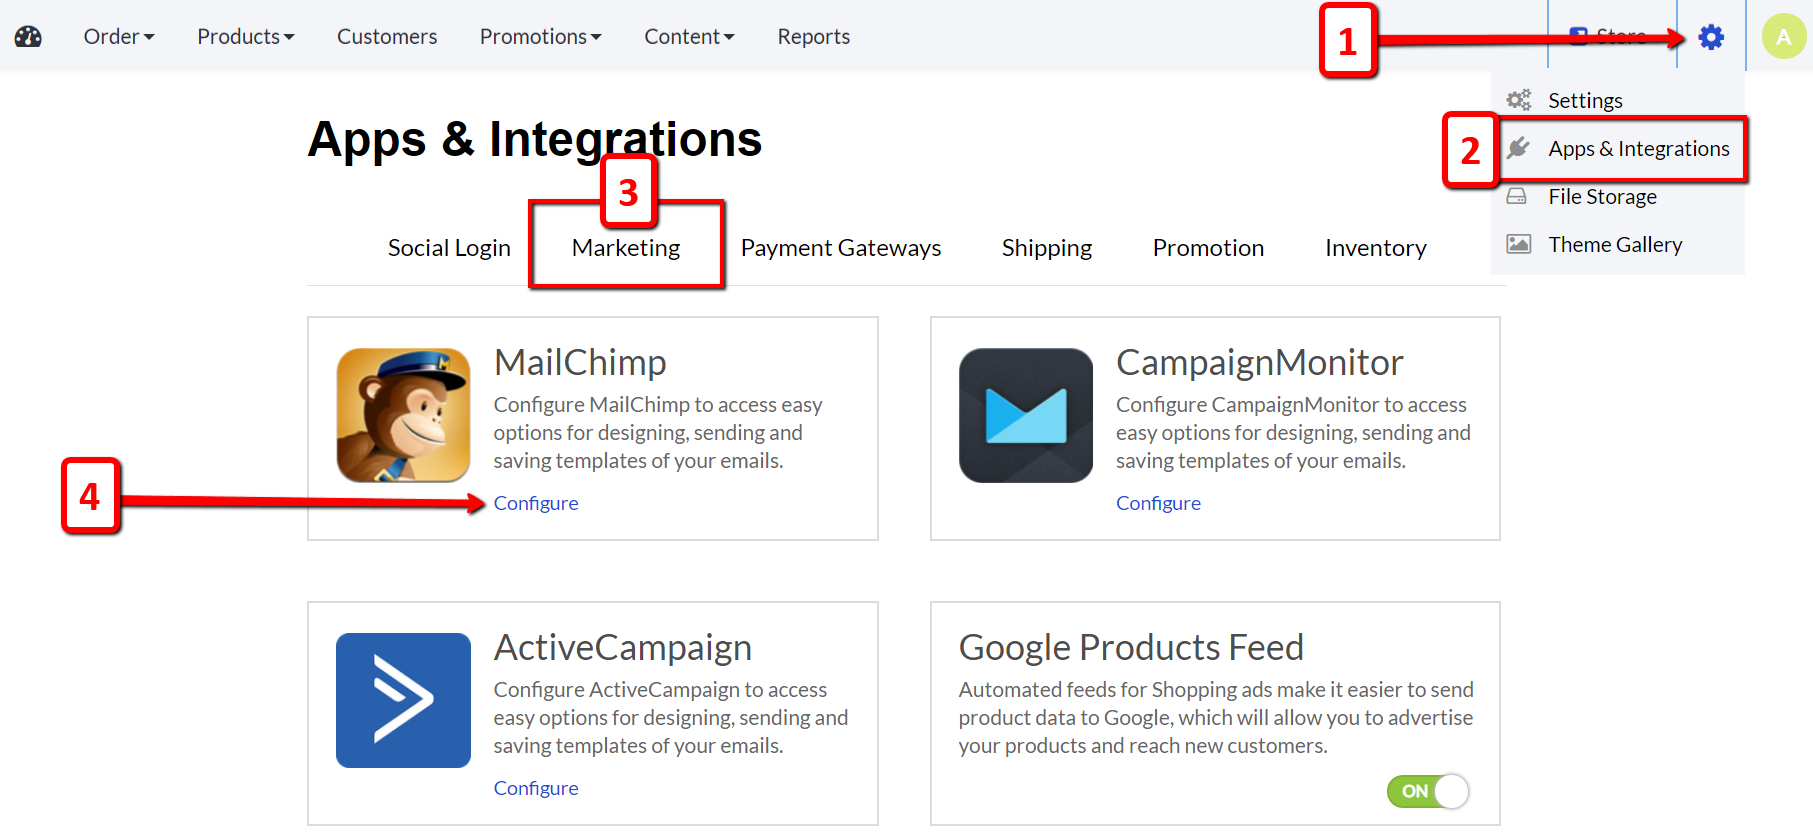
- Log in to your admin dashboard, and hover over the gear icon [1].
- Click Apps & Integrations [2] on the drop-down list and,
- Click the Marketing [3] label.
- Navigate to Mailchimp box and click the blue Configure [4] link:
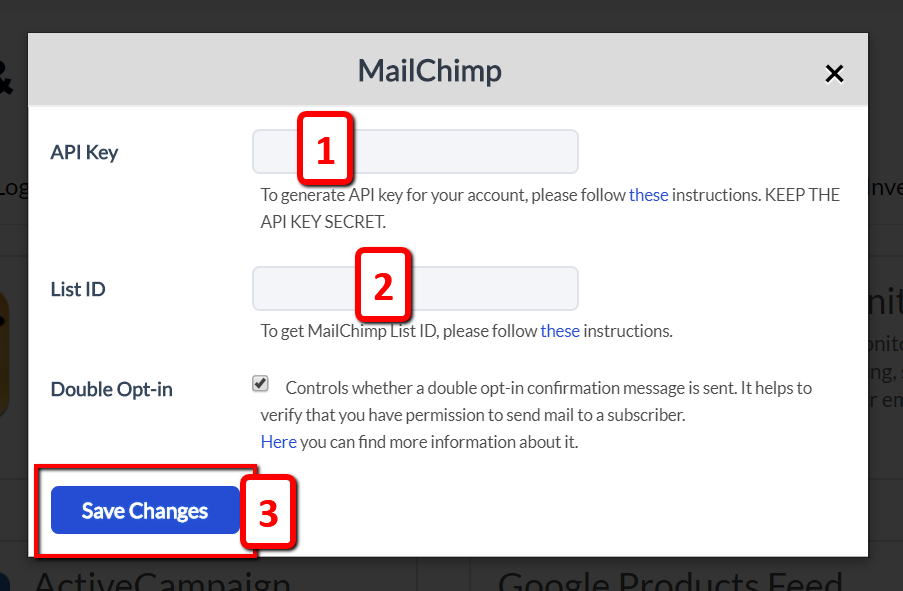
Clicking the blue Configure link will open a new menu:
- Paste the API key [1] found using the steps above and,
- Likewise paste the Audience ID/List ID [2] on the empty configurations field.
- Make sure to hit the blue Save Changes button [3]:
The Mailchimp App will automatically be turned ON when you’re all done making these modifications.
All ecomnation templates come with the Mailchimp app. Upon completing the steps above, data synchronization into Mailchimp should be working. Be sure to double check everything with a simulated user signup.
Drop us a support request at [email protected] and we will be happy to help you out if you are having issues.